Grills & Griddles
How to Cook the Perfect Hamburger on a Gas Grill
Nothing says 'summer' quite like a perfectly grilled hamburger. But achieving that juicy, flavorful, steakhouse-quality burger on your gas grill can be tricky. Too often, they end up dry, dense, or falling apart. Forget the guesswork. This guide will give you the straightforward, step-by-step process for grilling the best burgers you've ever made. From choosing the right meat to the final flip, we’ll cover the simple secrets to burger perfection.
The secret to an amazing burger starts long before you fire up the grill. The choices you make in the kitchen are just as important as your grilling technique, and this is what separates a truly memorable burger from an average one.
This is the single most important decision you will make. The foundation of any great hamburger is the beef itself.
Once you have your meat, it's time to form the patties. How you handle the meat at this stage is critical and can be the difference between a tender burger and a tough one.
Seasoning elevates a good burger to a great one. But when and how you season is a critical timing issue.
Now that your patties are prepped and seasoned, it's time to head to the grill and cook them to perfection.
Never, ever put a burger on a cold grill. Preheating is essential for getting that perfect, crusty sear. That high heat triggers the Maillard reaction, a chemical process between amino acids and sugars that creates the complex, savory flavor and deep brown crust we all love. A cold grill steams meat; a hot grill sears it. You want a sear.
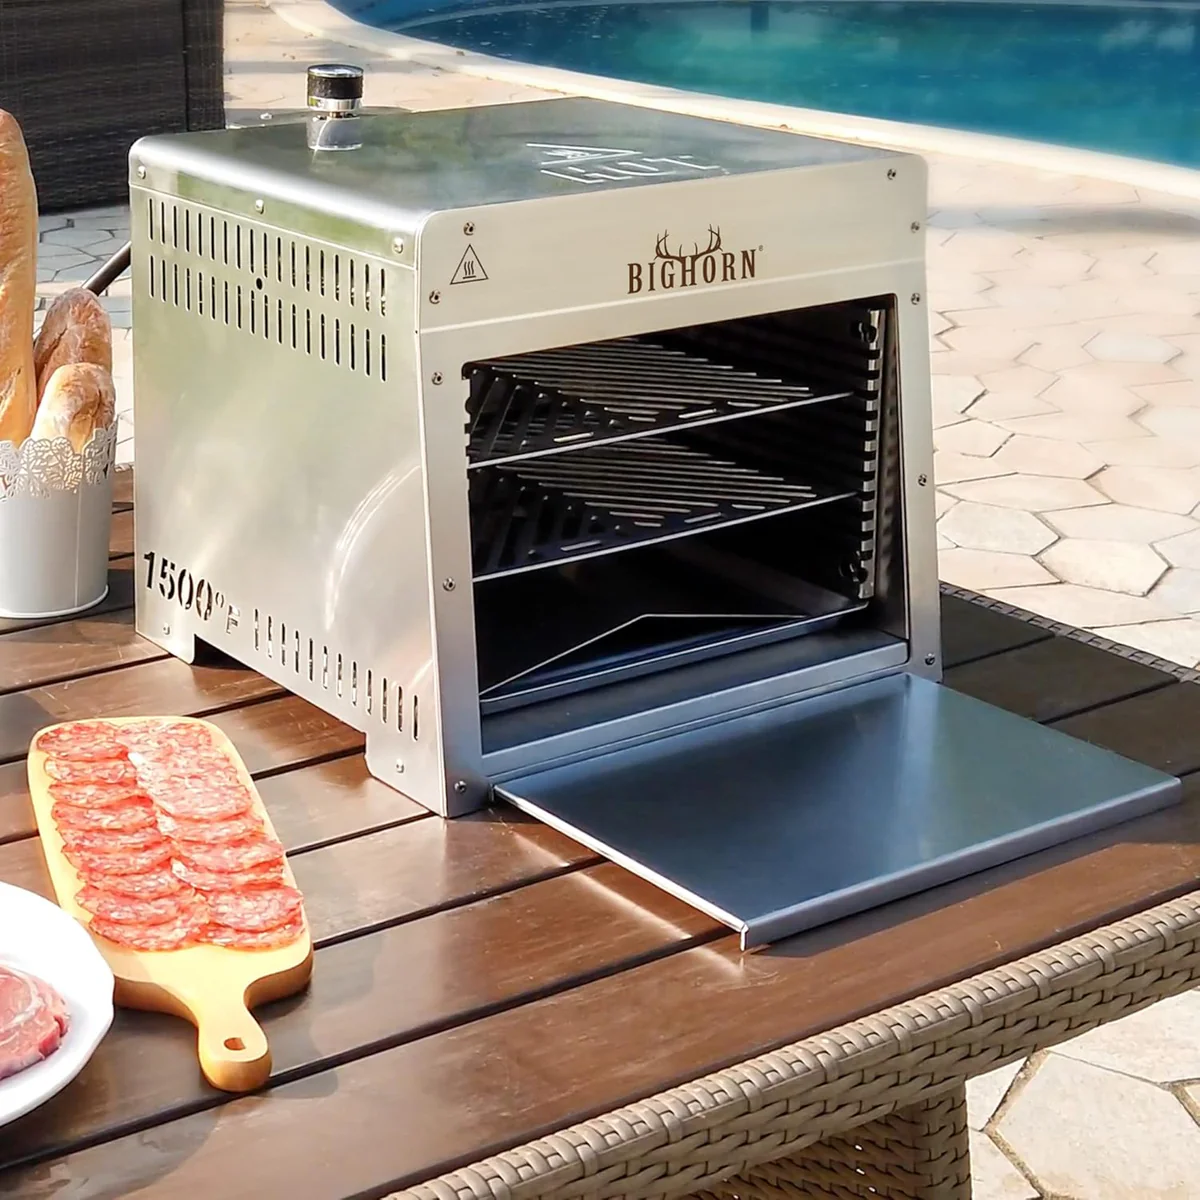
The Right Tool for the Job: A high-quality gas grill is ideal for cooking burgers because it provides even, consistent heat. Grills like the Big Horn Outdoors® Infrared Gas Grill are especially effective, as their intense heat is perfect for locking in the juices. Aim for a grill temperature of around 400-450°F.
While the grill is preheating, use a grill brush to scrape off any leftover bits from your last cookout. Once the grates are clean and hot, oil them to create a non-stick surface. Fold a paper towel, dip it in a high-smoke-point oil (like canola or vegetable oil), and use tongs to rub it carefully over the grates.
Once your grill is hot, clean, and oiled, place the patties directly over the heat. Leave at least an inch of space between them to ensure they cook with direct heat rather than steaming each other.
Let's settle the great debate. The idea that you should only flip a burger once is a myth. For a more evenly cooked burger with a great crust on both sides, it's actually better to flip it more often. Grill the burgers for about 3-4 minutes on the first side to form a nice crust, then begin flipping every minute or so. This technique helps the burger cook more evenly from edge to center.
The only way to know for sure if your burger is cooked to your liking is to use an instant-read meat thermometer. Color is not a reliable indicator. A burger can be brown inside and still be undercooked, or pink and be perfectly safe. A thermometer is a non-negotiable tool for anyone serious about grilling. Insert it horizontally from the side into the thickest part of the patty.
Here's a guide to internal temperatures for burgers:
The USDA recommends cooking ground beef to an internal temperature of 160°F for safety.
If you're making cheeseburgers, add a slice of your favorite cheese to each patty during the last minute of cooking. Close the lid to ensure it melts perfectly. And don't serve a beautifully grilled burger on a cold, flimsy bun! During that last minute, place the buns, cut-side down, on the grill away from direct heat until they're golden brown and lightly toasted.
You're almost there! These last two steps are crucial for serving the best burger possible.
This is the final secret to a juicy burger, and it is crucial. Just like a steak, a burger needs to rest for a few minutes before you eat it. During cooking, the muscle fibers in the meat tighten and push the juices toward the center. Resting allows those fibers to relax, letting the juices redistribute evenly throughout the entire patty. If you skip this, those juices will spill out onto your plate on the first cut or bite. Let your burgers rest for 3-5 minutes on a clean plate.
Now for the fun part! Assemble your burger with your favorite toppings. The toasted bun will hold up better to the juices and condiments. Whether you prefer classic lettuce, tomato, and onion, or something more adventurous, you've now created the perfect canvas.
This is usually due to one of two things: the meat is too lean (not enough fat to bind it), or it was handled too much when forming the patties, breaking its structure. Stick with 80/20 ground beef and be gentle.
Flare-ups are caused by fat dripping onto the flames. The best way to manage them is to have a "two-zone" fire—a hot side and a cooler side of your grill. If a flare-up happens, simply move the burgers to the cooler zone until the flames die down.
Here is your Juicy Burger Checklist. If you follow these five rules, you will not have a dry burger:
Cooking the perfect hamburger on a gas grill is an art, but it's one that anyone can master with a little knowledge and practice. By following these techniques, you've learned not just what to do, but why you're doing it. You're now ready to grill the best burgers of your life with confidence.
Ready to take your grilling to the next level? Explore the full line of high-performance grills and outdoor cooking equipment from Big Horn Outdoors®.
 Red Wine Mushroom Gravy Beef Tips on Infrared Grill
Master steakhouse-quality beef tips at home! Marinated for flavor, seared fast on an infrared grill, and topped with a rich red wine mushroom gravy.
Red Wine Mushroom Gravy Beef Tips on Infrared Grill
Master steakhouse-quality beef tips at home! Marinated for flavor, seared fast on an infrared grill, and topped with a rich red wine mushroom gravy.
 Pro Tips: Grilling Thick-Cut Steak for Maximum Flavor
Master grilling thick-cut steaks at home. Learn essential prep, resting tips, and how to use 1500℉ infrared heat for a flawless, restaurant-quality...
Pro Tips: Grilling Thick-Cut Steak for Maximum Flavor
Master grilling thick-cut steaks at home. Learn essential prep, resting tips, and how to use 1500℉ infrared heat for a flawless, restaurant-quality...
 How to Make a Smash Burger on an Infrared Grill
Standard grills ruin beef by losing flavor. Use a cast iron plate on an infrared grill to lock in moisture and make the perfect smash burger crispy...
How to Make a Smash Burger on an Infrared Grill
Standard grills ruin beef by losing flavor. Use a cast iron plate on an infrared grill to lock in moisture and make the perfect smash burger crispy...