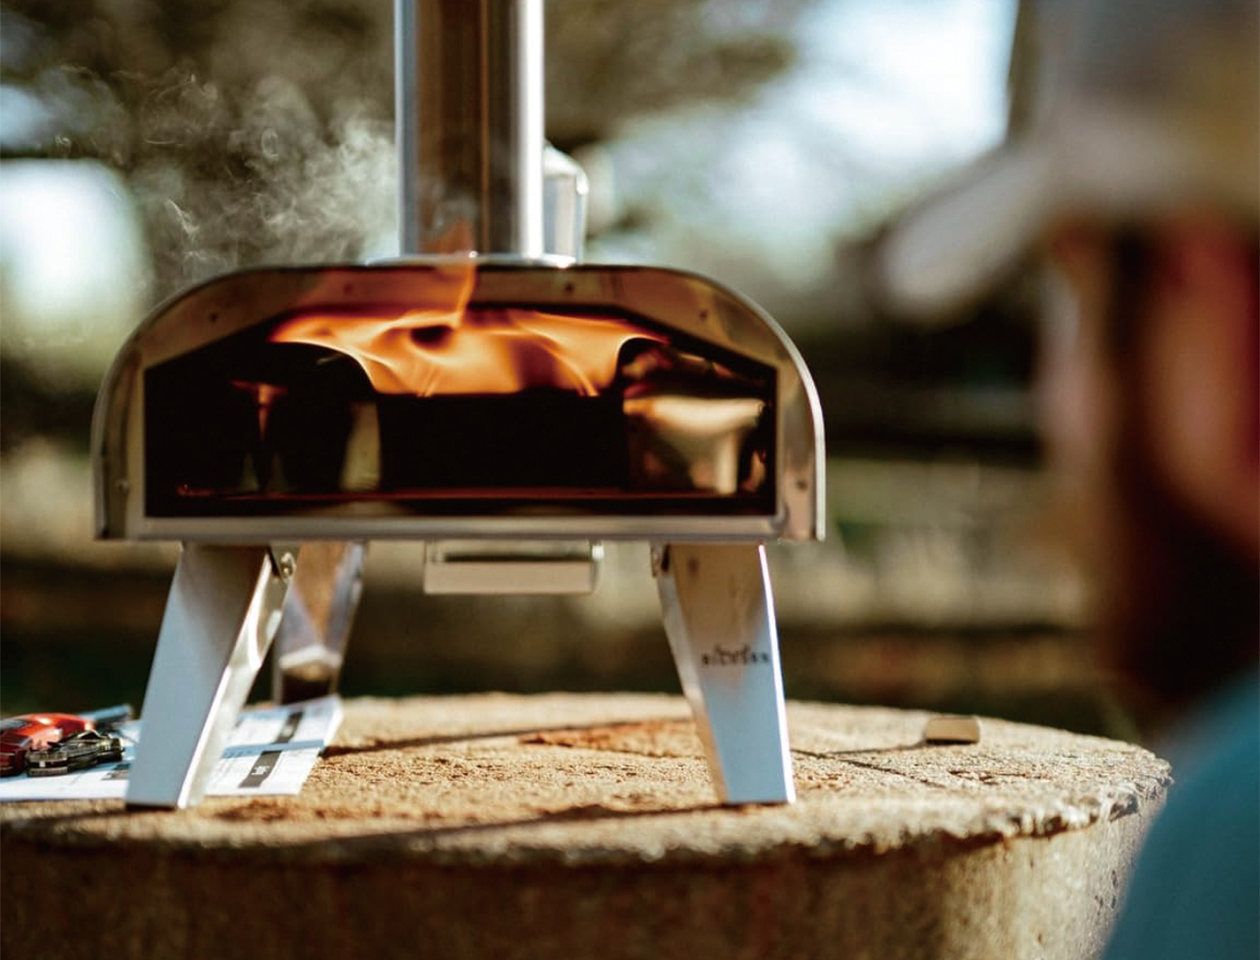
A portable wood-fired pizza oven is portable only if one vehicle, one site, and one operator can manage its entire hot-to-cold cycle. Product weight matters, but so do loose stones, chimneys, soot, wood, tools, hot ash, weather, and the long wait before repacking. A successful trip therefore begins with transport planning rather than ignition.
Use a cold rehearsal at home. Pack the oven exactly as it will travel, carry it the expected distance, assemble it with the tools you intend to bring, and reverse the process without consulting a forgotten box. This exposes missing gloves, unstable tables, awkward lifts, and components that have no clean return container.
Separate “Portable” Into Four Tests
An oven can be light enough to advertise as portable yet fail the trip in another way. Evaluate four distinct requirements.
1. Vehicle fit
Measure the packed oven, not only its assembled footprint. Include a protective case, chimney sections, fuel tray, stone packaging, peels, wood container, and cool ash container. Check the cargo opening as well as floor space. A box that fits inside may not pass through the door at a safe lifting angle.
2. Human carry
Read the current product weight, then account for detachable pieces and the case. Decide whether one or two people will lift it. Identify real handholds; do not carry by a door, chimney, hopper, fuel tray, gas fitting, or other removable projection. Rehearse stairs and the longest expected path while the unit is cold and empty.
3. Site setup
The destination needs an approved stable surface, required clearances, safe wind conditions, permitted fire use, and a traffic-free working zone. A folding camp table is not automatically suitable for concentrated oven weight and heat; use the support specifications in the exact manual.
4. Cold return
The schedule must include full burnout or shutdown and complete cooling. If the group needs to leave at a fixed time, calculate backward. A hot oven cannot safely become “portable” because the trunk is ready.
| Test | Evidence to collect | Pass condition |
|---|---|---|
| Vehicle fit | Packed dimensions and cargo-opening measurement | All pieces secure without stacking heavy gear on the oven |
| Carry | Real cold carry with intended person(s) | Controlled lift and stable grip across the full route |
| Setup | Manual, site rules, support inspection | Approved location and level heat-capable support |
| Return | Timed hot-to-cold rehearsal | Oven, stone, ash, and chimney fully cold before packing |
Check Fire Rules Before Loading the Car
Rules at parks, campgrounds, beaches, and public lands can change with weather and fire danger. A reservation does not guarantee that a solid-fuel oven will be allowed on the day of the visit. Check the managing authority’s current restrictions close to departure and again on arrival, and ask specifically about wood-burning cooking devices—not only “grills” or established fire rings.
Some restrictions permit pressurized-gas appliances with a shutoff valve while prohibiting wood or charcoal. A portable wood-fired oven does not become exempt because the fire is small or enclosed. If solid fuel is prohibited, leave that oven at home, and do not substitute pellets, charcoal, or another combustible material unless both the site rules and oven manual permit it.
Bring a no-fire meal plan. That backup protects the trip from cancellation pressure and prevents an unsafe “just one pizza” decision.
Build a Transport Manifest
Keep hot, sooty, sharp, and food-contact items in separate groups. Remove only components that the manual identifies as removable. Wrap a pizza stone so it cannot flex or receive point impacts, and do not let a metal chimney strike it during travel.
Oven kit
- oven body and approved support or legs;
- protected stone or cooking surface;
- chimney, cap, door, fuel tray, and fasteners;
- model-specific tool or assembly hardware;
- long-handled launch and turning tools;
- heat-resistant gloves; and
- cold-ash container and cleaning tool.
Fuel and fire kit
- permitted dry untreated wood in a sealed container;
- approved starter and ignition tool;
- site-required water or extinguisher equipment; and
- a flashlight for inspecting the site after sunset.
Food kit
- dough in covered containers;
- toppings kept at 40°F (4.4°C) or below;
- separate clean serving board and cutter;
- hand-cleaning supplies and potable water; and
- bags or rigid tubs for waste and dirty utensils.
Do not pack food with soot-coated tools or ash equipment. Secure fuel so loose pieces cannot become projectiles. If the vehicle carries gasoline or another fuel for unrelated equipment, follow all applicable storage requirements and keep ignition sources separated.
Choose the Site With a Cold Oven
Walk the area before unloading everything. Look upward for branches, awnings, umbrellas, and roof material. Look outward for tents, vehicles, dry vegetation, fences, doors, and play routes. Look down for levelness, combustible debris, roots, and a surface capable of supporting the full operating weight.
Wind deserves a pause. Gusts can alter draft, carry sparks, slam a door, or push heat toward the cook. Use the manual’s orientation guidance and site rules, and do not construct a close windscreen that blocks ventilation or traps heat. If conditions exceed what the setup can safely manage, use the backup meal.
Place prep and serving tables outside the hot zone. Arrange the workflow so nobody carries raw toppings or cooked pizza behind the oven operator, and remember that the vehicle should not form one wall of the cooking station; radiant heat, smoke, and traffic make the open trunk a poor prep counter.
Assemble From a Photograph and Checklist
During the home rehearsal, photograph the correctly assembled cold oven from the front, side, and rear. At the destination, compare chimney seating, cap orientation, door position, legs, stone, and fuel components. Confirm that every foot is supported and the unit does not rock.
Do not force a component that warped in transit or use a substitute fastener of unknown heat performance. If the stone is cracked through, a chimney is crushed, a leg will not lock, or the fire tray is damaged, do not light the oven. Portability increases vibration and impact, so inspection is part of every trip.
Before ignition, designate one oven operator. Place long tools where they can be reached without crossing the fire opening, and establish a child- and guest-free boundary where only the operator adds fuel or moves a door.
Run a Small Field Menu
The first trip is not the time for twelve pizzas. Plan two to four modest pizzas with pre-portioned toppings. A smaller menu reduces fuel demand, food exposure, and pressure to relight a failing fire.
Keep perishable ingredients cold until each pizza is assembled. USDA guidance uses a two-hour limit for perishable food at ordinary ambient conditions and one hour when temperature is above 90°F (32.2°C); put out small containers and replenish them from the cooler instead of leaving the full supply beside the oven.
Build the fire only by the model’s approved process. Use known dry wood, observe stable combustion, and let the floor establish a repeatable pattern before launching. Field wind and a cold support can change the warm-up from the backyard baseline, so judge readiness using the same measurement method and a controlled first bake rather than a promise on the clock.
| Field event | Planned time | Actual time | Observation |
|---|---|---|---|
| Ignition | Wind and startup smoke | ||
| First stable cooking baseline | Floor trend and flame state | ||
| Final fuel addition | Must support departure deadline | ||
| Fire fully ended | No active flame or permitted fuel process complete | ||
| All parts verified cold | Packing may begin |
Calculate the Departure Deadline Backward
The most important field calculation starts with the required departure time. Subtract the oven’s observed cooling period, cold cleaning and inspection time, packing time, and a safety margin. The result is the latest final fuel addition—not necessarily the last pizza time.
| Item | Time allowance |
|---|---|
| Required departure | 6:00 p.m. |
| Load vehicle | 20 minutes |
| Cold cleaning and inspection | 20 minutes |
| Observed full cooling plus margin | Enter your tested value |
| Latest final fuel addition | Calculate from the rows above |
Do not copy someone else’s cooling duration. Stone thickness, oven mass, fuel load, wind, and ambient temperature change it. Run a supervised trial at home and use a generous margin. Touching one exterior panel is not a cold verification; inspect the stone, fuel tray, ash, chimney, underside, and any insulated area identified by the manual.
Handle Ash and Soot for the Return Trip
Follow the manufacturer’s shutdown instructions. Never pour water into the hot oven or onto the stone, and do not dump embers into a public fire ring, soil, sand, water, or a trash bin. Ash can conceal hot material long after visible flame ends.
Once every part is fully cold, remove ash by the approved method into a noncombustible lidded container suitable for the site and transport. Keep it upright and separate from food and fabric. Brush loose soot only where the manual permits; a sooty chimney should have a dedicated bag or rigid tub so it does not contaminate the oven case, vehicle, and food equipment.
Before packing, count every component and inspect the ground for pellets, wood, food, foil, and ash. Leave the site cleaner than it was found; photographing the empty cold station can help confirm nothing remained near dry vegetation.
Field-Trip Safety Checklist
- Current site fire restrictions and the exact oven’s outdoor-use instructions verified before travel; no solid fuel where the rule prohibits it.
- Approved stable surface with all clearances and airflow paths open; vehicle, tent, canopy, vegetation, and public traffic kept outside the hot zone.
- Only permitted dry untreated wood and approved starters; no liquid accelerant; one operator supervising the fire continuously.
- Perishable toppings chilled at 40°F (4.4°C) or below; clean serving tools separated from raw-food and soot equipment.
- Final fuel addition calculated backward from departure with a tested cooling margin; no hot oven moved or packed.
- Prescribed shutdown followed; stone, ash, chimney, tray, body, and underside confirmed fully cold before packing, with the site inspected and left clean.
Frequently Asked Questions
Can I use a portable wood-fired oven during a campfire ban?
Not unless the current rule explicitly permits that type of solid-fuel device. Restrictions vary by authority and conditions; check the official source close to the visit, since “no wood fires” may still ban an enclosed wood-burning oven even when gas appliances are allowed. If wood is prohibited, use a legal alternative or a no-cook meal.
Can I put the oven on a picnic table?
Only if the oven manufacturer and site authority permit it and the table satisfies the required heat resistance, stability, dimensions, and clearances. A wooden picnic table should never be assumed suitable merely because it is level; a heat mat does not change the table’s load or heat rating.
How soon can I load the oven after cooking?
Only after shutdown is complete and every component—including the cooking floor, ash, chimney, fire tray, underside, and insulated areas—is fully cold. Determine the schedule through a supervised trial and include a safety margin; exterior panels can cool while the stone and ash bed stay dangerously hot.
Should I transport the stone inside the oven?
Follow the model’s instructions. If removal is allowed or required, protect the stone against flexing and point impact. If it remains installed, secure the oven so vibration and loose metal components cannot strike it; a crack found at the destination means the trip is over before ignition.
What if wind becomes strong after ignition?
Follow the manual’s safe shutdown process and keep the area guarded. Do not carry or rotate a hot oven, and do not build an improvised close windbreak. If the fire cannot be controlled normally, use emergency procedures and contact local emergency services.
Portability Ends Only When the Oven Is Cold
A portable wood-fired pizza oven succeeds on the road when transport, site legality, assembly, live-fire operation, and cold return are planned as one job. Rehearse the carry, protect the stone, verify current restrictions, build a modest menu, and calculate the final fuel addition backward from departure. The decisive feature is not how quickly the oven leaves the trunk. It is whether the entire group can leave the site on time with no heat, ember, ash, food-safety, or cargo problem left behind.