Guides & Tips
How to Plan the Perfect Outdoor Pizza Party: A Step-by-Step Guide
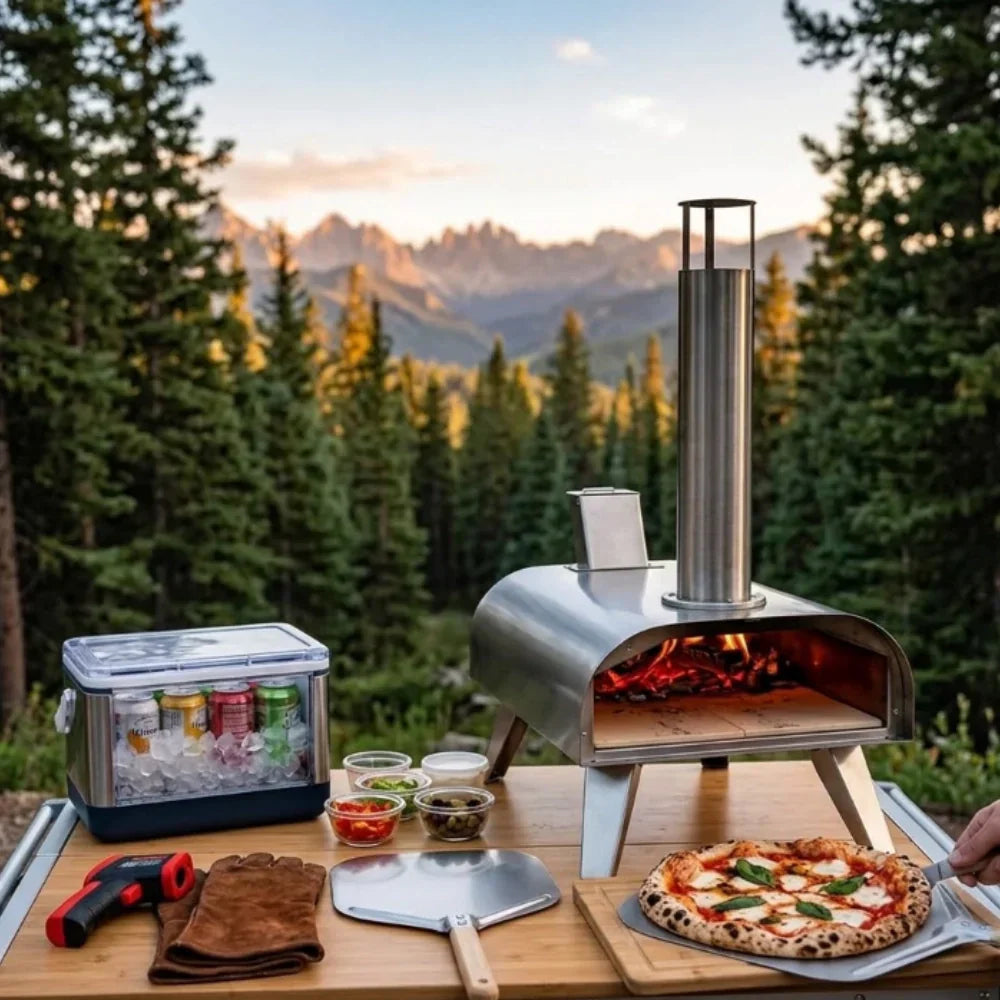
Biting into a slice of hot, bubbling pizza with a crispy crust while surrounded by towering pines and fresh mountain air transforms a regular meal into an unforgettable adventure. Taking your pizza game off-grid works for camping, tailgating, or park gatherings—and planning a “pizza in the wild” party is easier than you think if you have the right strategy.
Location is everything when you take the kitchen outside. You need a safe, functional cooking zone, not just a scenic view.
At a campsite, choose a designated fire ring area or a sturdy picnic table. At a park, look for covered pavilions or areas with natural windbreaks.

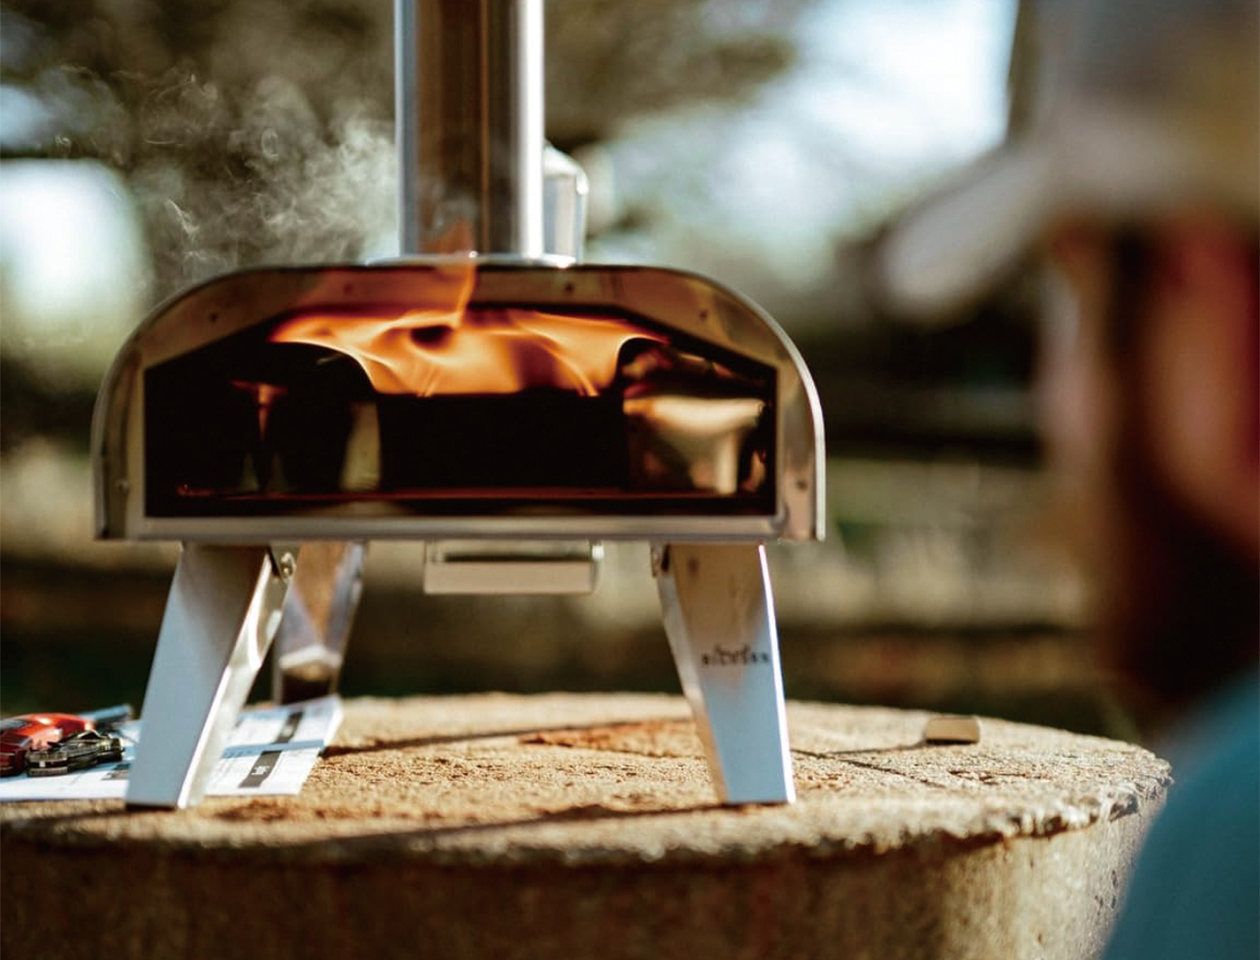
The beauty of modern outdoor cooking is portability. You don’t need to build a brick oven from scratch to get restaurant-quality results.
| Oven Type | Fuel Amount | Coverage |
| Pellet ovens | 5 lbs of pellets | 10-12 pizzas (Allows for startup and consistent heat maintenance) |
| Propane ovens | 2 x 1lb propane canisters | ~2 hours total runtime (1 hour per canister), enough for 10+ pizzas |
Pack everything in labeled bins or bags. Note that a standard 1lb propane canister lasts about 45-60 minutes on high heat, so always bring at least two canisters to ensure you don't run out of fuel mid-party.
Dough is alive—yeast is actively fermenting. If it gets too warm during transport, it will over-proof and become a sticky, unmanageable mess.
The key is controlling temperature. Your dough should stay dormant during transport and only wake up when you’re ready to cook.
Mise en place (everything in its place) is the professional chef’s secret, and it works perfectly for outdoor cooking.
If you’re hiking to your location or have limited cooler space, consider par-baking your crusts at home:
Once you arrive, your first task is creating an efficient workflow. Organization is the difference between a smooth operation and a chaotic scramble.
Think of your outdoor kitchen like a restaurant line:
This left-to-right (or right-to-left) flow allows you to stretch, top, and launch in one smooth motion without backtracking.
Safety is non-negotiable when cooking at 800°F+ in the wild.
A proper preheat is non-negotiable. A cold stone equals a soggy, undercooked pizza.
| Oven Type | Preheat Time | Target Temperature |
| Propane ovens | 15-20 minutes | Stone: 700°F+, Oven: 800-900°F |
| Pellet ovens | 20-30 minutes | Stone: 700°F+, Oven: 800-900°F |
Use your infrared thermometer to verify the stone surface is at least 700°F. The ideal range is 700-750°F for the stone and 800-900°F for ambient oven temperature.
While the oven preheats, take your first dough ball out of the cooler to warm up. By the time the oven is ready, your dough will be at the perfect temperature for stretching.
Now comes the fun part. Cooking pizza outdoors requires attention and quick reflexes, but once you get the rhythm, it’s incredibly satisfying.

Even experienced pizza makers run into issues outdoors. Here’s how to troubleshoot on the fly:
Stop. Don’t force it. Lift the edge of the dough and blow air underneath to create separation. Add more flour to the stuck spots. Prevention: always shake your peel before launching.
Your stone is too hot. Allow it to cool for 2-3 minutes, or reduce your flame/fuel slightly. You can also lift the pizza toward the dome of the oven for the last 15-20 seconds to finish the toppings without over-cooking the bottom.
Position the oven so the door opening faces away from the wind. Create a windbreak using camping chairs, a tarp, or your vehicle. In very windy conditions, propane gas ovens perform better than pellet ovens.
It got too warm. Put it back in the cooler for 15 minutes. In the meantime, use more flour on your work surface and hands. Body heat warms dough quickly, so work fast.
Check for ash buildup blocking airflow (especially in pellet models). Make sure the chimney isn’t obstructed. Shield the oven from wind. In cold weather, allow extra preheat time—outdoor temperatures affect performance.
Food scraps attract bears, raccoons, and other wildlife, which can create dangerous situations for future campers. Oil and grease can contaminate soil and water sources. By cleaning thoroughly and packing out everything, you protect the environment and ensure these outdoor spaces remain available for the next pizza party.
By planning your location, organizing your gear, managing your dough transport, and respecting the environment, you can master the art of pizza in the wild. The key is preparation and practice. Your first outdoor pizza party might have a few hiccups, but by your third or fourth, you’ll be slinging pies like a seasoned pizzaiolo.
Ready to take your outdoor cooking to the next level? Big Horn Outdoors® has the portable pizza oven designed to make your next adventure delicious. Check out our lineup and start planning your next outdoor feast.
Plan for approximately 3 hours from arrival to departure: 30 minutes for setup and site preparation, 20 minutes for oven preheat, 30-60 minutes for cooking (depending on how many pizzas you’re making—figure 3-5 minutes per pizza including assembly time), and at least 1-2 hours for cooldown and cleanup before packing up.
Absolutely. Store-bought dough is often more stable and easier to transport than homemade dough. It’s already portioned, and commercial dough typically handles temperature fluctuations better. Keep it cool in your cooler until you’re ready to stretch it, and allow it to come to room temperature for about an hour before use.
First, shield the oven from wind using camping chairs, a tarp, or your vehicle as a windbreak. Check for ash buildup that might be blocking airflow, especially around the burner grate or ventilation holes. Make sure your chimney isn’t obstructed. In cold weather (below 50°F), allow extra preheat time—outdoor temperatures significantly affect oven performance. If you’re using a pellet oven, ensure your pellets are dry; moisture reduces their heat output.
Always use semolina flour or regular flour on the peel before placing your dough. Semolina works best because it’s coarser and acts like tiny ball bearings. Work quickly when topping your pizza—the longer dough sits on the peel, the more moisture it absorbs, which causes sticking. Before launching, shake the peel gently side-to-side. If the pizza doesn’t move freely, stop and add more flour underneath the stuck spots.
It’s risky. While many portable pizza ovens have insulated legs that reduce heat transfer, radiant heat from the oven body can still warp or melt plastic. It is much safer to use a wooden picnic table, a metal camping table, or place a heat-resistant mat or thick wooden board under the oven if a plastic table is your only option. Always check the manufacturer’s guidelines for your specific oven model.
 Big Horn Outdoors® Expands Retail Presence with New Experience at Piedmont Outfitters
Big Horn Outdoors® is excited to announce a new retail destination for outdoor cooking enthusiasts. Customers can now experience the brand's popula...
Big Horn Outdoors® Expands Retail Presence with New Experience at Piedmont Outfitters
Big Horn Outdoors® is excited to announce a new retail destination for outdoor cooking enthusiasts. Customers can now experience the brand's popula...
 As Seen on NBC Daytime: Big Horn Outdoors® Pizza Oven and Infrared Steak Grill Featured on National Television
Featured on NBC Daytime, the 12-Inch Multi-Fuel Pizza Oven and 16-Inch Infrared Steak Grill demonstrate how Big Horn Outdoors® helps make high-qual...
As Seen on NBC Daytime: Big Horn Outdoors® Pizza Oven and Infrared Steak Grill Featured on National Television
Featured on NBC Daytime, the 12-Inch Multi-Fuel Pizza Oven and 16-Inch Infrared Steak Grill demonstrate how Big Horn Outdoors® helps make high-qual...
 Red Wine Mushroom Gravy Beef Tips on Infrared Grill
Master steakhouse-quality beef tips at home! Marinated for flavor, seared fast on an infrared grill, and topped with a rich red wine mushroom gravy.
Red Wine Mushroom Gravy Beef Tips on Infrared Grill
Master steakhouse-quality beef tips at home! Marinated for flavor, seared fast on an infrared grill, and topped with a rich red wine mushroom gravy.